Soil Assessment Field Guide
0% readSoil Assessment: From Sampling and Contamination to Delineation and Remediation
Learn how environmental soil investigations are planned, how samples are collected and interpreted, how contamination is delineated in three dimensions, and how remediation is verified through defensible field data and laboratory analysis.
A soil assessment is not simply a collection of laboratory results. It is a structured investigation intended to understand site conditions, determine whether contaminants are present, evaluate their distribution and potential risks, and support decisions about remediation or ongoing management. The appropriate investigation depends on site history, potential contaminants, geology, hydrogeology, land use, exposure pathways, and the decisions the investigation must support. Alberta's assessment and reporting requirements and the CCME Guidance Manual for Environmental Site Characterization frame the process this guide walks through.
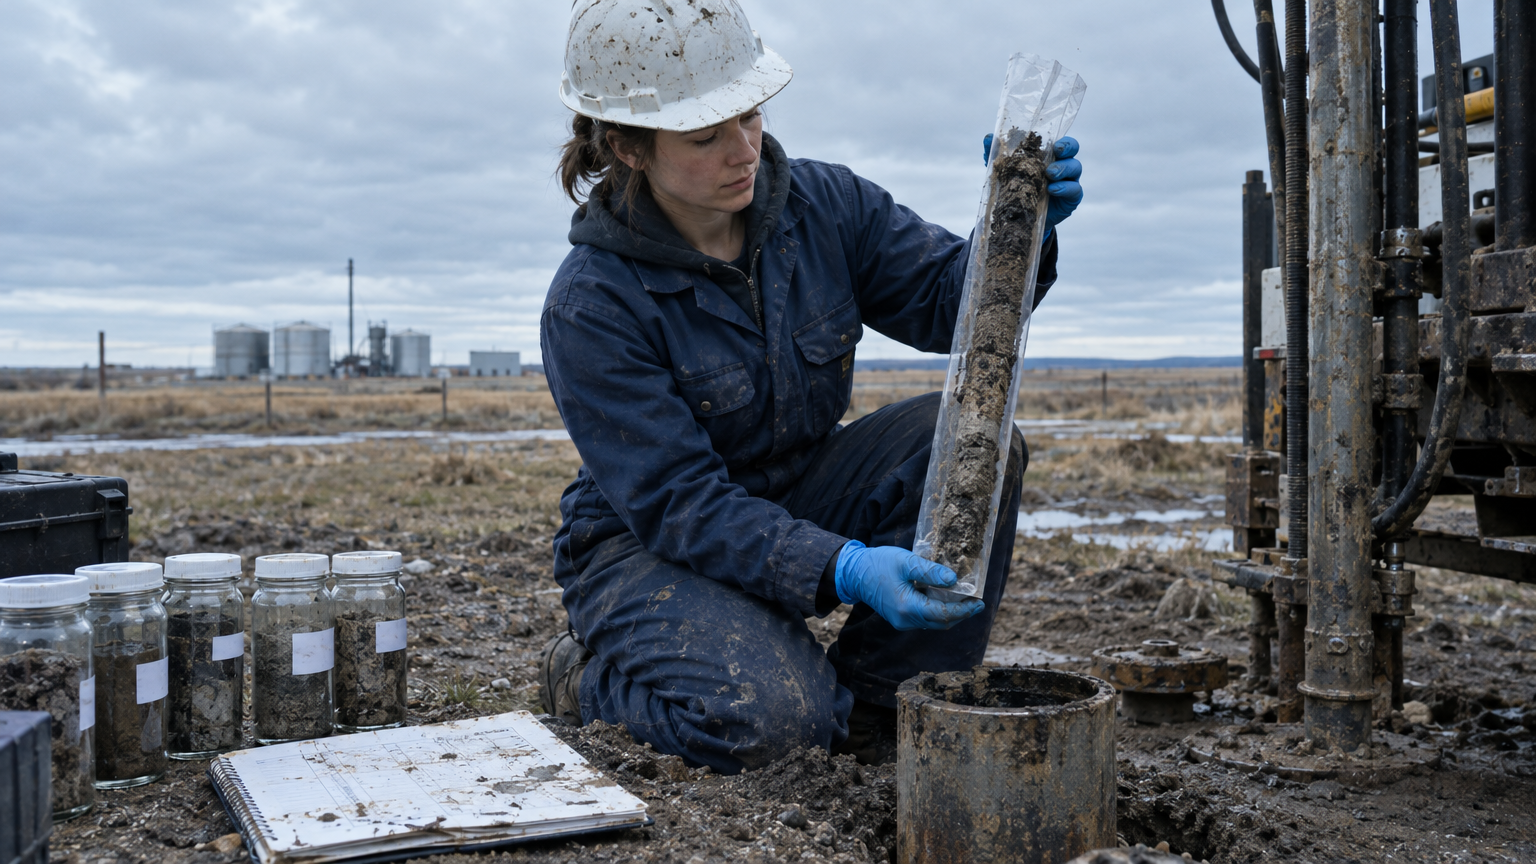
What Is an Environmental Soil Assessment?
An environmental soil assessment is a structured process for investigating soil conditions at a property or project site — from records review to intrusive sampling, characterization, risk evaluation and, where needed, remediation and verification.
The purpose is decision-making, not data collection for its own sake. An assessment exists to answer specific questions: are substances present at concentrations that matter, where are they, could they reach people or ecosystems, and what response is required under the applicable regulatory framework. Alberta's Environmental Site Assessment Standard and assessment and reporting guidance describe how that process is expected to be carried out and documented, and the CCME site characterization guidance sets out the investigation planning behind it.
Preliminary investigation
Review historical records, past and current site activities, known or suspected releases, aerial imagery, site plans, available environmental reports, and other relevant evidence.
Intrusive investigation
Collect soil samples and, where warranted, investigate groundwater, soil vapour, surface water, sediment, or other environmental media.
Site characterization
Determine what substances are present, where they occur, at what concentrations, and how they vary with depth and across the site.
Risk evaluation
Consider the potential for contaminants to reach human or ecological receptors through relevant exposure pathways.
Remediation or risk management
Determine the appropriate response based on applicable criteria, site conditions, risks, land use, and regulatory requirements.
Verification and closure
Collect and evaluate evidence that remediation or risk-management objectives have been achieved, where required.
In the Canadian context, this work is often organized as a Phase 1 environmental site assessment — a non-intrusive review of records, site conditions and interviews — followed, where potential concerns are identified, by a Phase 2 environmental site assessment involving intrusive soil (and sometimes groundwater or vapour) investigation. Exact scopes, terminology and reporting requirements depend on the applicable standard and jurisdiction, and the current edition of the governing standard should always be confirmed before an investigation is planned.
The soil investigation lifecycle
The lifecycle is iterative: each round of results feeds back into the conceptual site model and can change the next round of sampling.A Good Investigation Starts Before the First Sample
Sample locations chosen without a site-specific rationale produce results that are hard to defend. A conceptual site model (CSM) is what turns scattered boreholes into a designed investigation.
A conceptual site model brings together everything already known or reasonably inferred about a site before drilling starts. The CCME Guidance Manual for Environmental Site Characterization treats the CSM as the backbone of investigation design, and EPA's site characterization guidance uses the same idea: sampling answers the questions the model raises, and every result updates it.
- Historical and current site uses
- Potential contaminant sources
- Release mechanisms
- Soil and geological conditions
- Groundwater conditions
- Contaminant migration
- Potential receptors
- Exposure pathways
- Information gaps and uncertainties
Site history is where the model begins, and it changes what the investigation looks for:
- A former fuel storage area may warrant investigation for petroleum hydrocarbons and related substances.
- An industrial property may require consideration of process-specific chemicals or historical releases.
- A site with a fill history may warrant evaluation of heterogeneous imported materials and potential contaminants within them.
- Former agricultural or industrial activity may justify investigation of substances associated with that activity, based on evidence.
None of these examples assumes contamination is present — they are hypotheses the sampling plan is designed to test. A model that documents information gaps and uncertainties is more defensible than one that quietly ignores them.
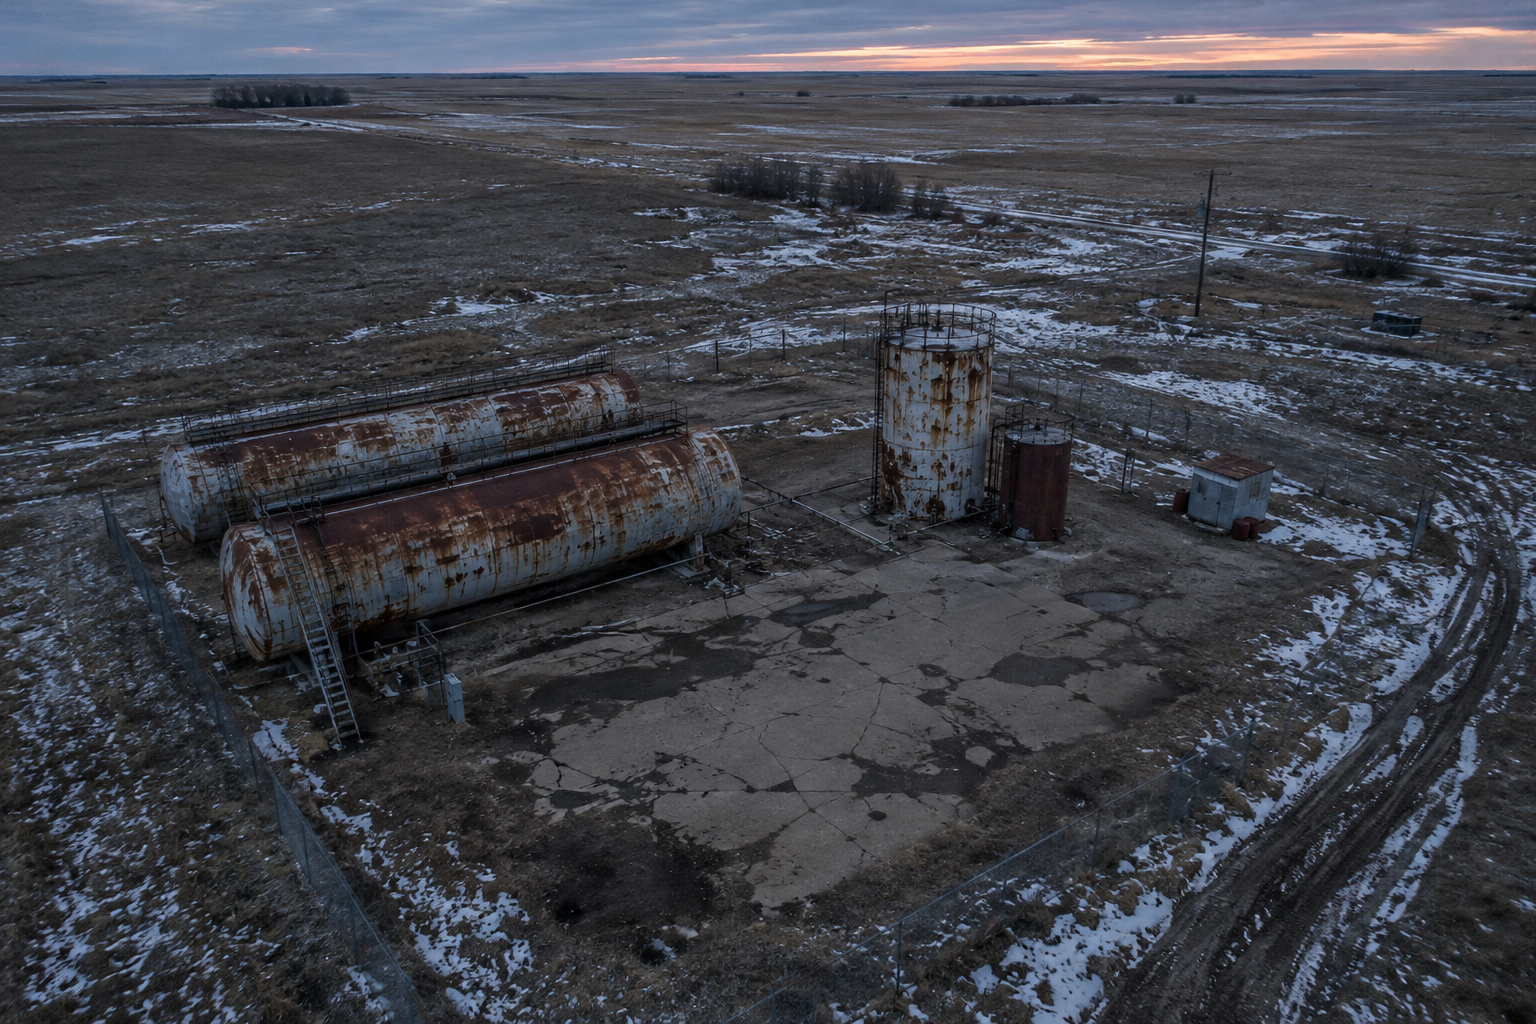
Aerial imagery is a classic Phase 1 ESA line of evidence: successive photo years can show when storage areas, buildings or fill placement appeared — and where sampling should look first.
Sampling Design Determines What You Can Conclude
A soil sampling program is defensible when its design matches the questions it must answer. The plan should be built around the investigation objectives, the conceptual site model, the expected contaminant distribution, the relevant soil units, and the decisions the data must support.
The CCME site characterization guidance and EPA's guidance on choosing a sampling design make the same point from different jurisdictions: state the decision first, then choose the design. A sampling pattern that is elegant but unrelated to the decision is not evidence. Alberta's Environmental Site Assessment Standard expects the investigation and its findings to be documented well enough that a reviewer can follow both.
Targeted sampling
Locations are selected based on suspected sources, visible evidence, historical activities, field observations, or other known areas of concern. Efficient for investigating suspected hotspots and known release areas — but it says little about areas nobody looked at.
Systematic or grid-based sampling
Locations are distributed using a planned spatial arrangement. Grids support spatial coverage and make it easier to detect an unexpected plume between targets, but the spacing must suit the objectives and the scale of the investigation — a grid that is too coarse can step right over a narrow impact.
Judgmental sampling
Locations are selected using professional knowledge and site-specific evidence. Appropriate for targeted questions, provided the rationale — and its limitations — are documented so a reviewer can see what the sample can and cannot represent.
Random or statistically based sampling
Locations are selected using a statistical design that answers a defined question about a defined population of soil (often a decision unit). Statistics require appropriate assumptions and study design; collecting a random handful of samples does not automatically make an investigation representative.
Step-out sampling
Additional samples are collected beyond an identified impacted location to find the boundary of contamination. Step-outs are the working tool of both horizontal and vertical delineation, discussed in Section 08.
Confirmatory sampling
Samples are collected after remediation to evaluate whether remediation objectives have been met. Confirmatory sampling is a verification activity and should be designed around the applicable criteria and the remedial objectives, as discussed in Section 11.
Sampling approaches at a glance
| Sampling approach | Typical purpose | Strength | Important limitation |
|---|---|---|---|
| Targeted | Suspected sources, known release areas | Efficient where evidence points somewhere specific | Little information about areas outside the targets |
| Systematic / grid | Spatial coverage of a site or area | Reduces the chance of missing unexpected impacts | Spacing must match the scale; too coarse and impacts are stepped over |
| Judgmental | Professional knowledge of a specific question | Uses site-specific evidence well | Rationale and limitations must be documented |
| Random / statistical | Defined questions over defined soil populations | Supports quantitative statements with set assumptions | Assumptions and study design must genuinely hold |
| Step-out | Boundary of a known impact | Directly supports delineation | Only as good as the spacing between step-outs |
| Confirmatory | Post-remediation verification | Tied to remedial objectives and criteria | Must be designed for the remedy and the question asked |
How Soil Samples Are Collected and Documented
Sampling methods depend on the investigation objective, the depth of interest, soil conditions, contaminant properties, access, health and safety requirements, and the analytical program. Whatever the method, it must preserve the integrity of the sample and support the required analyses.
Test pits and excavations
Useful for observing shallow soil conditions and collecting samples from exposed materials, subject to safe excavation practices and project requirements. They show stratigraphy directly — but only near surface.
Hand sampling tools
Useful for certain shallow investigations where soil conditions and objectives permit. Simple, inexpensive, and limited in depth and in the soil types they can penetrate.
Direct-push or drilling methods
Support investigation at greater depths or where subsurface characterization is required, including continuous lithology logging and the installation of monitoring instruments where warranted.
Field screening instruments
May provide rapid readings or help guide sample selection in the field. A field screening result is not automatically equivalent to a laboratory analytical result — it directs the investigation; it does not replace the laboratory.
In the field, the record is the evidence. A sample whose origin cannot be reconstructed — where it was, how deep, who collected it, what was done to it — is far weaker than one with a complete trail. EPA's field sampling quality control guidance treats field documentation as a quality measure in its own right, and the CCME operating procedures and analytical methods volumes work through the same details.
Every field record should capture
Unique sample ID
Sample location and coordinates
Ground elevation or reference datum, when relevant
Sample depth and interval
Date and time
Sample collector
Sampling method
Soil description and stratigraphy
Field screening observations and readings
Visible staining, odour, or other relevant observations
Photographs, where useful
Sample container and preservation details, as applicable
Laboratory analyses requested
Sample handling and custody information
Deviations from the planned procedure
Sample handling and QA/QC
Appropriate sample containers for the analyte and method
Sample preservation requirements
Holding times (analyte- and method-specific — do not generalize)
Decontamination of reusable equipment between locations
Prevention of cross-contamination between depths and locations
Field duplicates
Equipment blanks or other blanks, where appropriate
Chain-of-custody documentation
Laboratory method selection
Recording deviations and corrective actions
A laboratory result is only as defensible as the sampling, handling, identification and quality-control process behind it.
Odour, colour, staining and field screening can help guide an investigation — they can suggest where to sample and which intervals to send for analysis — but they cannot, by themselves, establish that soil is either safe or contaminated.
Different Contaminants Require Different Investigation Strategies
Contaminants differ in their sources, physical and chemical properties, persistence, mobility and potential exposure pathways — so the investigation, the analytical suite and the interpretation all change with the substance.
The examples below are common groups encountered in Canadian contaminated-site work, drawn from the substance-specific frameworks in Alberta's soil and groundwater remediation guidance, the CCME characterization guidance and EPA site characterization resources. They are examples — not a complete list, and not a diagnosis of any site.
| Contaminant group | Possible sources or contexts | Investigation considerations |
|---|---|---|
| Petroleum hydrocarbons | Fuel storage, spills, industrial operations | Hydrocarbon fractions, volatility, soil type, migration and potential vapour pathways |
| Metals and metalloids | Industrial activities, fill, mining, certain historical land uses | Natural background, chemical form, soil properties, land use and applicable criteria |
| Volatile organic compounds (VOCs) | Solvents, fuels, industrial chemicals | Volatility, sample preservation, soil vapour and groundwater pathways |
| Polycyclic aromatic hydrocarbons (PAHs) | Combustion residues, certain petroleum products, industrial materials | Source history, distribution in soil, potential exposure and applicable criteria |
| Salts and salinity-related parameters | Road salt, produced water, industrial releases, certain oil and gas activities | Chloride, sodium, electrical conductivity, sodicity and soil-specific interpretation |
| Pesticides and other organic chemicals | Agricultural, industrial or historical uses | Compound-specific persistence, mobility, degradation and exposure pathways |
| Asbestos-containing materials or debris | Historical building materials or demolition fill | Appropriate investigation protocols, material identification and applicable regulatory requirements |
Why behaviour matters more than the name
- Some contaminants are relatively mobile in water; others bind strongly to soil particles.
- Some are volatile and can generate vapour pathways; some persist for long periods.
- Mixtures can complicate interpretation — fractions and compounds interact differently with soil.
- Soil texture, organic matter, pH, moisture, redox conditions and hydrogeology all influence behaviour.
None of these relationships reduces to a universal rule. A substance that is essentially immobile in a clay-rich soil can behave very differently in coarse sand above a shallow water table — which is why geology and hydrogeology sit inside the conceptual site model, not beside it.
A Concentration Is Not a Conclusion on Its Own
Laboratory results are where the physical sample becomes data — but a number on a certificate of analysis only becomes evidence once its units, method, reporting limit, quality context and the applicable criterion are all confirmed.
Concentration and units
Analytical results may be reported in units such as mg/kg or other analyte- and method-specific units. Results in different units, or from different methods, are not directly comparable — never mix them in one comparison.
Detection and reporting limits
A result reported as less than a detection or reporting limit is not necessarily equivalent to zero. Interpretation depends on the method, the reporting limit, and the applicable decision criteria — a reporting limit above a criterion can hide a real question.
Laboratory methods
The analytical method must be suitable for the substance and for the applicable guideline or regulatory framework. A method with the wrong reporting limit or extraction basis can produce a number that cannot be compared to anything.
Quality assurance and quality control
Blanks, duplicates, calibration and laboratory QA/QC help evaluate the reliability of the data. Project-specific quality measures — field duplicates, blanks, custody checks — catch the errors that happen before the sample reaches the laboratory.
Background concentrations
Naturally occurring substances may be present in soil. Where the applicable framework allows or requires it, background conditions can matter when interpreting results for substances such as metals.
Comparison with guidelines
The correct comparison depends on jurisdiction, land use, exposure pathways, soil type and site conditions, the substance, the intended decision, and the applicable guideline edition. Checking the current edition is part of the comparison, not an afterthought.

The certificate of analysis is the physical end of a chain that started at the sample ID — interpretation has to walk that chain backwards.
Suppose a laboratory reports a concentration of a metal in a soil sample. Before any conclusion is drawn, the investigator checks: the sample ID and where and how deep it was collected; the units and the analytical method; whether any QA/QC flags attach to the result; the applicable guideline — its current edition, its land-use assumptions and the exposure pathways it covers — and whether natural background is relevant to the substance. Only then is further investigation warranted or not warranted. The number, by itself, decides nothing.
Screening frameworks such as EPA's Soil Screening Guidance illustrate the risk-based logic, but U.S. screening levels are not universal cleanup standards and must never be substituted for applicable Canadian or provincial criteria. Alberta's Tier 1 and Tier 2 remediation guidelines are the relevant comparison in that jurisdiction; analytical method expectations are covered in the CCME analytical methods volume.Finding Contamination Is Only the Beginning. Delineating It Is the Next Step.
Delineation is the determination of the spatial extent of contamination in the relevant environmental medium — how far it extends laterally, how deep it goes, and how confident the investigation can be about both.
Alberta's Environmental Site Assessment Standard and assessment and reporting guidance treat delineation of substances as a core expectation of site characterization, and the CCME guidance and EPA site characterization practice frame it the same way: the data must be sufficient to describe the extent, not just to detect the presence, of a substance.
Horizontal delineation
How far contamination extends laterally across a site. Additional samples beyond impacted locations — targeted step-outs, samples at property boundaries, and samples placed relative to geological features — establish the lateral extent.
Vertical delineation
How deep contamination extends. Design must weigh depth intervals, changes in soil strata, the depth of the suspected release, migration pathways, groundwater conditions, the contaminant's properties, and the investigation objectives.
Three-dimensional delineation, as a model you can turn
Reading a profile by depth
Illustrative example — not real site data and not a regulatory determination. The dashed line is a hypothetical guideline value invented for this figure; real comparisons use the applicable criteria for the jurisdiction, land use and guideline edition.A non-exceeding sample does not automatically prove that everything beyond it is uncontaminated. The strength of that inference depends on the sampling design, the spatial variability of the soil and the contaminant, analytical uncertainty, and the investigation objectives. Delineation commonly takes several rounds: each set of results refines the conceptual site model, which redirects the next set of step-outs. Data gaps and uncertainties belong in the report as explicitly as the results do.
Contamination and Risk Are Related, but They Are Not the Same Thing
Risk assessment asks a different question than site characterization: not only what is in the soil, but whether it can reach anyone or anything it could harm — and under which exposure scenarios.
Contaminant source
→
Release & migration
→
Exposure pathway
→
Receptor
Interpretation depends on whether a pathway is complete, plausible, or otherwise relevant under the applicable assessment framework. A contaminant sealed beneath a building slab with no vapour pathway and no groundwater connection presents a different risk picture than the same concentration in a garden soil over a shallow aquifer — land use matters because different uses involve different receptors and exposure scenarios.
Receptors commonly considered
- Site workers
- Future occupants
- Nearby residents, where relevant
- Ecological receptors
- Groundwater users and other receptors connected to groundwater pathways
Exposure pathways
- Direct contact with soil
- Incidental ingestion
- Inhalation of dust
- Vapour intrusion, where relevant
- Migration to groundwater
- Ecological exposure
Alberta's tiered approach to guideline comparison
Tier 1 — generic guidelines
Generic remediation guidelines developed for defined conditions and land-use scenarios — residential, commercial, industrial and so on. They let most sites be screened against pre-established criteria, as set out in Alberta's soil and groundwater remediation guidance.
Tier 2 — site-specific guidelines
Site-specific adjustments or guidelines where supported by the required information and accepted methodology. A Tier 2 approach is not simply choosing a more permissive number — it requires appropriate site-specific evidence, assessment, and compliance with the applicable framework.
How Contaminated Soil Is Managed or Remediated
The appropriate response depends on the contaminant, its distribution, soil and groundwater conditions, exposure pathways, site use, remediation objectives and regulatory requirements. There is no default remedy.
It helps to keep three responses distinct. Remediation removes or treats contamination. Risk management controls exposure or migration without necessarily removing the contaminant mass. Monitored natural attenuation relies on natural processes, where supported by appropriate evidence and accepted requirements — Environment and Climate Change Canada's guidance is explicit that it demands adequate characterization and performance monitoring, not just patience. Alberta's remediation guidelines and contaminated site remediation framework set the objectives these responses answer to, and EPA's characterization and monitoring technology resources cover how alternatives are screened in practice.
Excavation and off-site management
Impacted soil may be excavated and transported for appropriate treatment or disposal, subject to waste classification, transport, facility acceptance and regulatory requirements. Excavation limits, soil segregation, tracking and confirmatory sampling keep the removal defensible.
Ex situ treatment
Soil is excavated and treated outside its original location — for example bioremediation, thermal treatment or soil washing, where appropriate. Suitability depends on contaminant properties, soil characteristics, treatment objectives and project-specific feasibility.
In situ treatment
Treatment is performed within the ground without excavating all affected soil — for example certain chemical or biological treatments. Effectiveness depends on subsurface conditions, contaminant accessibility and the treatment mechanism actually reaching the contamination.
Containment and exposure control
In some situations a site may be managed using controls that reduce exposure or migration, where allowed and supported by the applicable risk-management framework. Containment does not necessarily remove the contaminant mass — it changes the pathway.
Monitored natural attenuation
Natural processes may reduce contaminant concentrations, mass, toxicity or mobility for some contaminants under appropriate conditions. It requires adequate site characterization, an appropriate conceptual model, and monitoring sufficient to demonstrate performance and protect receptors — it is a managed strategy, not a decision to walk away.
How alternatives are evaluated
Effectiveness
Protection of human health and the environment
Technical feasibility
Time
Cost
Secondary environmental impacts
Long-term management requirements
Regulatory acceptance
How Do You Know Whether Remediation Worked?
Completing an excavation or applying a treatment is not, by itself, proof that remediation objectives have been met. Verification is its own sampling program, designed for the remedy and the question.
Alberta's Environmental Site Assessment Standard and assessment and reporting guidance include confirmatory investigation and reporting expectations — a verification program may need to address the items below. None of these are universal requirements for every project: the plan depends on the site, the remedy and the applicable guidance.
Excavation floors and sidewalls
Remaining soil in the affected area
Residual contamination
Relevant soil and groundwater pathways
Applicable remediation criteria
Sample locations and depth intervals
Analytical methods
QA/QC
Documentation of the remedial work
Deviations from the approved plan
Remaining risks or management requirements
The sampling design must reflect the remediation method and the question being answered. An excavation is typically verified with samples from its base and walls, while a treatment project is verified with sampling that evaluates the treated material and the relevant performance indicators. Regulatory closure and certification requirements depend on the applicable program and project.
Remediation verification closes the loop between the investigation findings, the remedial action, and the evidence that the required objectives have been achieved.
From Sample IDs to a Three-Dimensional Site Model
Individual observations become a defensible understanding of site conditions when the relationships between them are maintained — and fall apart when they are not.
A useful conceptual data structure runs from the site down to the interpretation. Each relationship in the chain below matters: a concentration that has lost its depth, its coordinates or its QA/QC context is no longer evidence about a place in the ground — it is just a number.
Site
→
Investigation area
→
Sample location
→
Depth interval
→
Sample
→
Laboratory analysis
→
Result
→
Guideline comparison
→
Interpretation
In practice, a laboratory result should stay permanently associated with all of the following — anything less weakens every conclusion built on it:
- Its unique sample identifier
- Its location and coordinates
- Its depth interval
- The sampling date
- Its analytical method
- Its units
- Its reporting limit
- Its QA/QC context
- The applicable guideline or decision criterion
What site-wide visualization buys you
- Sample locations on a site map
- Vertical profiles and cross-sections
- Stratigraphy
- Concentration distributions
- Delineation boundaries
- Areas requiring further investigation
- Remediation and confirmatory sample locations
- Results over multiple investigation rounds
Maps and charts are aids to interpretation — they are not substitutes for the underlying data, the conceptual site model, professional judgment, or regulatory requirements. A well-drawn figure of a poorly documented dataset is still a poorly documented dataset.
The Investigation Can Generate More Data Than a Spreadsheet Can Easily Explain
A soil assessment or remediation project does not produce one dataset. It produces many, created by multiple field staff, laboratories, consultants and contractors at different times — and the connections between them are where defensibility lives.
Field logs
Borehole and test-pit records
Sample IDs
GPS coordinates
Depth intervals
Soil descriptions
Field screening readings
Photographs
Laboratory reports
Chain-of-custody records
Analytical result tables
QA/QC records
Guideline comparisons
Remediation records
Confirmatory samples
Maps
Final reports
When those records live in disconnected files, the practical risks are ordinary and familiar to anyone who has assembled a remediation report:
- Sample identifiers may be transcribed incorrectly.
- Laboratory results may be disconnected from their original field context.
- Coordinate or depth information may be missing.
- Different spreadsheets may contain inconsistent versions of a dataset.
- Investigation rounds may be difficult to compare.
- Photographs may not be linked to the correct sample or location.
- Remediation records may be difficult to reconcile with confirmatory results.
- Data gaps may be harder to identify.
One distinction matters for data quality: a missing data point and a result that was measured but failed a quality-control check are different data-quality conditions, and they must not be treated as equivalent — one is a gap in the investigation, the other is a measurement whose reliability is in question. EPA's field sampling quality control guidance frames both explicitly. This section describes risks that arise on real projects; it does not claim every project experiences them, and no error rate or administrative saving is implied.
Design the Data Workflow Around the Investigation
The tools matter less than the sequence. A technology-neutral field-to-report workflow keeps field observations, laboratory results, spatial context and project decisions connected from the first borehole to the final verification record.
The objective of the workflow below is not automation for its own sake — it is to maintain the relationship between what was observed in the field, what the laboratory measured, where each sample came from, and what was decided at every stage. The CCME guidance's emphasis on planning, field procedures, QA/QC and data interpretation is effectively a workflow requirement: each stage feeds the next, and a break anywhere in the chain weakens the report at the end of it. The thirteen steps are grouped into four phases below; the number beside each step is its position in the full sequence.
Plan
Set the investigation up before anyone goes to site.
Plan the investigation
Configure sampling locations and required fields
Collect
Capture field observations and sample identities together.
Collect field observations and sample information
Record GPS, depth, time and sample ID
Maintain sample handling and QA/QC documentation
Validate
Check results against their samples, their quality and their context.
Receive laboratory results
Match results to the correct samples
Review data quality and guideline comparisons
Map and interpret contamination
Plan additional delineation or remediation
Report
Carry the record through remediation to the verification file.
Record remedial activities
Collect confirmatory samples
Prepare reports and verification records
Where Digital Field Data Management Fits Into Soil Assessment
Everything in the previous sections — sampling design, analytical methods, defensible interpretation, regulatory compliance — stays exactly as it is. Digital data management does not replace any of it. Its role is to help preserve the connection between field observations, sample identities, laboratory results, locations and project records.
aQRate is a field data collection and management platform that can support soil-assessment workflows by organizing structured field records, GPS-linked observations, sample information, laboratory data, and reporting or visualization outputs in a connected dataset. In the workflow language of Section 14, that maps to:
Field investigation
→
Sample records
→
Laboratory results
→
QA/QC review
→
Spatial & analytical views
→
Reporting
Being accurate about what that means also means being accurate about what it does not do:
- aQRate does not independently determine the extent of contamination.
- aQRate does not replace laboratory analytical methods.
- aQRate does not select or approve remediation technologies.
- aQRate does not automatically determine regulatory compliance.
- aQRate does not replace a qualified environmental professional.
- aQRate does not replace a GIS or a specialist contaminant-transport model where those are required.
Explore a soil assessment workflow in action
Structured field forms, sample tracking from collection through laboratory results, and site-wide views of the data collected.The Soil Assessment Template, Built and Filled
The template's real soil assessment log — sample ID, date, time, location, depth, field screening readings and laboratory parameters such as TPH fractions and metals — shown here as it is built and filled in the field.
Soil Assessment Log-Repeated Form
Sample ID*
Sampling Date*
Sampling Time*
Sample Location*
Depth (m)
VOC-PID (ppm)
pH
Temperature (C)
TPH-F1
TPH-F2
Lead
Benzene
Soil Assessment Log-Repeated Form
DELIN-G49-D3.0
2026-08-25T00:00:00.0000000Z
17:16:00
59.51353, -111.27923
3
0.7
6.57
11.5
—
—
—
—
Report ready: Soil Assessment Comprehensive Report
Sources and Further Reading
Every technical claim in this article traces back to one of the government guidance documents or technical manuals below. Before publication or regulatory reliance, verify that each document and URL is still accessible and identify the current edition of any applicable standard.
Canadian readers should apply Alberta and federal guidance as the governing framework for their jurisdiction. U.S. EPA references are included for their technical method value only — they are not Canadian regulatory requirements.
Canadian and Alberta guidance
The core Alberta standard for Phase 1 and Phase 2 environmental site assessment, intrusive investigation, delineation, confirmatory work and reporting. Confirm the current edition before relying on it.
How Alberta expects sites to be assessed, substances delineated, and findings documented to support remediation or risk management and, where applicable, Records of Site Condition.
The Tier 1 and Tier 2 remediation guideline framework, risk-based interpretation, land-use considerations and site-specific remediation objectives.
The broader Alberta context for contaminant releases, contaminated-site management, environmental and human-health protection and regulatory closure.
The four-volume manual: guidance, checklists, suggested operating procedures and analytical methods — use the volume that matches the task.
Investigation planning, conceptual site models, risk assessment, sampling strategies, field procedures, QA/QC and data interpretation.
Sampling and data quality
General soil sampling procedures and field considerations, useful as method-level background.
Field documentation, sampling consistency, QC measures and data reliability — the practices behind a defensible field record.
How to match a sampling design to the investigation objectives and the decisions the data must support.
Characterization and remediation
Site characterization technologies, field screening methods, monitoring approaches and technology selection.
Identifying contaminants, determining the extent of contamination, assessing risks and coordinating characterization with remedial planning.
Screening levels and risk-based evaluation. U.S. screening levels are not universal cleanup standards and must not be substituted for applicable Canadian or provincial criteria.
What monitored natural attenuation requires: adequate site characterization, a sound conceptual model, and monitoring sufficient to demonstrate performance.